Wednesday, 16 August 2023

Bumblebee

 I just need to write this to not forget.

Yesterday we spotted a bumblebee stumbling amongst long blades of grass, climbing one, falling down, climbing one, falling down. I thought maybe this miniature panda of the insect world needed a hand so I let it climb my hand and put it on a dandelion in a small unkept field. Most of the flowers looked pretty spent already, this is the best we could do. We squatted there for a long time observing it, poor thing looked exhausted and was just hanging on to the flower for dear life. Not once in this did it try to fly. We left it there.

This morning I went to see, and our little buddy was still there. I pet it to check if it was still alive and it squirmed. I then noticed that many new dandelions had opened up so I forced it on my hand to get to the good stuff. It activated really slowly, but it ate. And then stopped and hung to the flower, not moving.

I made that flower reach for another one, it went on slowly, groggily, and ate. No attempt to fly. Another flower. And another one. My friend's movements became faster now. It was eager for the next one. No more flowers within reach, I gave it a lift to the next patch on my hand.

Already yesterday I grew attached to it. I didn't know if it could fly at all, I didn't know how long I could spend in the field doing that, but I wanted this lil bugger to live. Though I was worried that it was just unable to fly; I mean what would happen then? I can't spend the rest of its days making sure it eats, but can I really not..? I know nature sorts itself out, but this was now my pal. We were in this together.

After 40 or so minutes, over 10 dandelions, as I was about to give it another lift, it took off. It flew to the next flower.

I sat there in the field and started sobbing. My reaction took me by surprise. I was just so glad. Now it's out there bumbling on its own. This tiny creature's reign isn't over yet. Farewell, little one. I love you.


Saturday, 17 June 2023

Sorrel Sweater

 I thought I had deleted this blog? Guess I didn't. Well good for me; I felt like blabbering on an old sweater I knit 3-ish years ago, instead of working on the sleeve of my current make, or swearing after the hem of a shirt I'm sewing.

Procrastination~


Sorrel sweater by Wool & Pine


I discovered this pattern through Dunderknit's Knitting Vicariously episode 39. (Caroline, I miss your online presence dreadfully) video in question

She went for a gradient, like many others, as the pattern eases the blending of colours by adding a strand of mohair of one colour through out the whole sweater. It truly blurs the edges of colour change, and with some good choices, make for a seamless transition.

 I fell in love with the pattern at the same time as I fell in love with the hand dyed yarn of a Tampere store. 


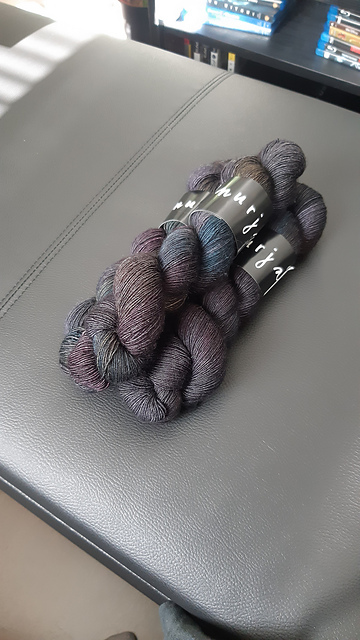
Nurja Merino Single in colour Sielu


The world's gothiest rainbow.

So I went for this rather than a faded version, as they also dye mohair in the same colourway. I thought Adding anything to Sielu other than more Sielu would be a downgrade.

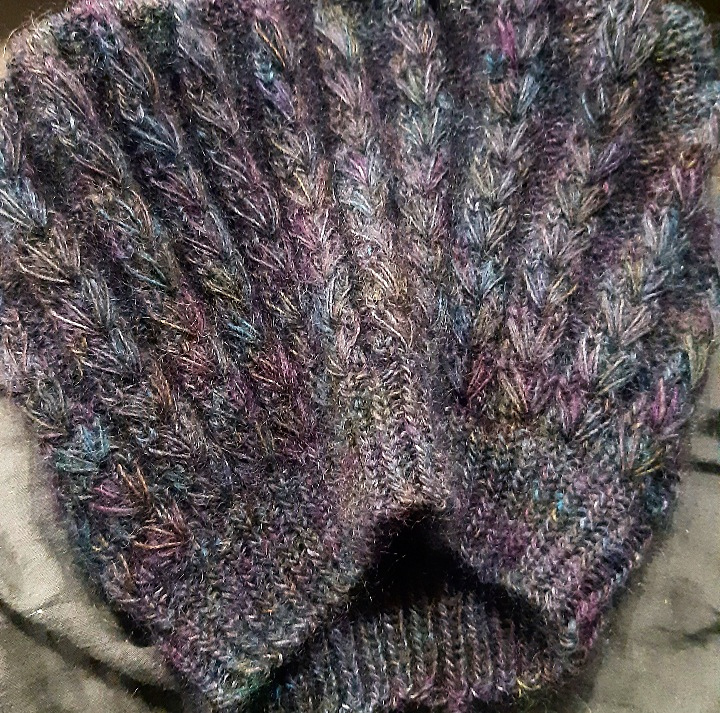
Oil spill coloured yoke

It's also the only make where I held 2 strands. After that the trend exploded and 2-strands-held-together became The Big Thing and I didn't follow along.

I cast on 88 stitches using the Alternative Cable Cast On after trying and failing 4 times the Tubular Cast On.

The dip stitches making up the columns came with video instructions, which was appreciated. But I still ran into a problem, as many others did.  I was of those who had this gaping ladder between the dipping column and the flat work. I went to see in people's projects and it seems most have this going on, but almost nobody mentions it. In all the fluff and darker colours, it was visible enough to bother me.Fixing that was off the beaten path and time consuming, but I owe it to the Ravelry user BrightEyesKnits who explain how they managed it: treating the ladder like a dropped stitch, and bringing everything up with a hook, creating an extra stitch that woud then be decreased to retain the desired stitch count for the yoke.

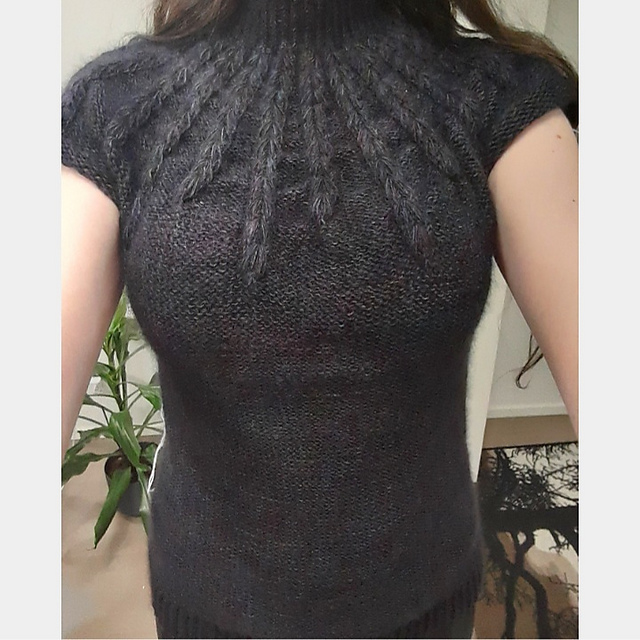
Sad desaturated pre-sleeves shot

The whole body is knit in reversed stockinet, but the pattern has you doing that inside-out to avoid purling for days. It's a nice thought. Only, they have you just flip the pullover inside-out and go from there, nothing else. That creates a small hole where the switch is made. It's fixed with a simple shortrow technique to avoid the gap.


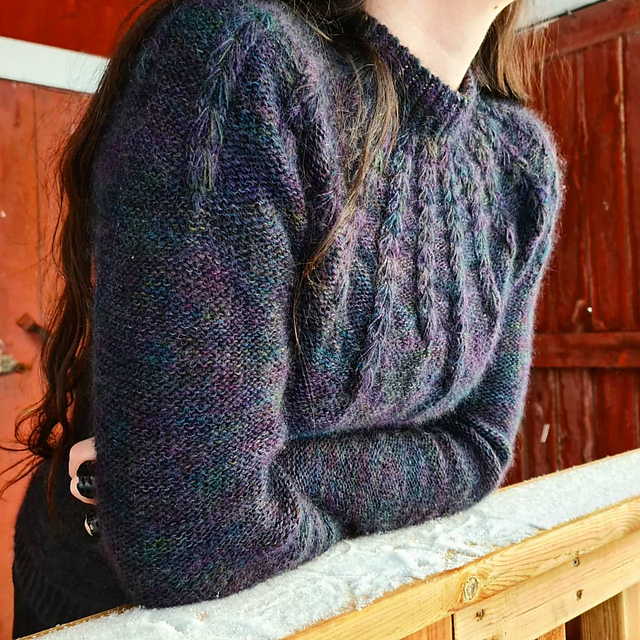
The final product is one I can only wear in the most frigid conditions, as mohair + merino combo will keep me more than toasty. It's soft, it's cozy, I love that the colours make no sense. Despite the couple of hurdles I had to jump to get to the end, I love this jumper.

Saturday, 14 August 2021

From the vault review: Nui Cobalt- Second Harvest: Fruit

I was writing this here for the Scents Sibyl forum boards because notepad always crashes on this phone. I decided to publish it because why not, love of perfume deserves to be shared!

"Luscious abundance.
Homemade pies and preserves brimming with spiced pear, blackberry, apricot and currant. Wear this confection to attract pleasure and feelings of contentment. Anoint pink or gold candles to manifest luxury and creature comforts."

From the vial: sugared and spiced currant and apricot. Bit syrupy.

Wet on the skin: very jammy apricot and berries with a hint of mulling spices. There might be a quick flash of pastry note, but it's so ephemeral that I wondered if it was worth mentioning.

Dry on skin: still fruity. Though it's not your fresh summery fruit salad; it's seasoned, cooked, canned, and comforting. Berries, dark and warm. A pear that is rather shy indeed, macerating in its own syrup in the background of the picture.
I was told there would be pie, but I suppose someone took the crust and ran away with it, leaving the fillings behind. No pastry note in the slightest. 

2 hours in: this fella isn't a big morpher. The apricot is back, but warmer than at the beggining. Sweet and round. At this point is it a bit closer to the skin

Projection at its strongest: half an arms lenght. I get it on full blast while I knit, but I get only an elusive whiff when my arms are fully extended (I dabbed on my wrist)

Longevity: becomes a nondescript skin scent after 5-ish hours.

Best part of photoshoots for gourmand perfumes is eating the props afterwards 


Sunday, 4 July 2021

After one sewing project


Hi. Sometimes, I cannot get my dopamine fix through knitting due to hand injuries, so I figured sewing would take the torch when this happens.

These are the records of my first trepidations into Fabric Land. Enjoy.

Can I just begin by saying it's not the same flow? Oof, when I start a knitting project, even casting on annoys me because I want to just get in the rhythm of things. Sewing? Heck it's more preparation than the actual act of stitching.

I opted for a dress, for the first project. Something simple, but with some challenge:


Burda 6687, view A. It's 5 panels and an invisible zipper. Fabric picked for that was a black linen, and cotton voile for the lining.

And with by "some challenge" I mean starting from scratch, knowing nothing about sewing, and just learning along.

  • tracing
  • measuring the seam allowance, as it was not included
  • darts
  • invisible zipper
  • lining and sewing that b*tch in there (instructions were confusing as heck)
  • hemming... we'll talk later about that
  • I heard about interfacing for the very first time 
  • the term "princess seam" just to show you how blindly I jumped in this


The quality of the picture reflects the quality of the time spent tracing. *fart noise*

Burda doesn't include seam allowance. So it was interesting to deal with that for the first time. There I went, tracing some more, 1.5cm around the drafting paper and chopped that off.

After ironing on the interfacing, I pinned the center front and side fronts together. First difficulty, and first spark of excitement, coming from the same thing: curves. It took me by surprise for some reason, how it's a bit of a fiddle to get the curved lines to lay against each other to be pinned. But once that was done, I saw some shape take form, and THAT got my motivation up!

The floor is my working table. Super ergonomic! Not shown: the chalk line I had to redraw on the seam line, because the cut wasn't exactly even.

After stitching, before ironing

Okayy now we're getting somewhere, now I can understand the hype! I was a slow start, but the "I'm making things with my hands" buzz is finally kicking in.

Thennn came the zipper.

It's not that they explain badly in the pattern's instructions, but they explain like they're talking to someone who's been in the sewing universe all their lives. So I ditched the instructions, went on YouTube, got the zipper in, got a soul-boner from how proud I was.


Booyah, invisible zipper.


Then I stitched the rest of the sides, did the whole thing all over because I forgot about the lining (thankfully I had 2m of cotton voile lying around from a mistake purchase. Happy little accidents!)

Came the time to attach the lining to the dress aaaaand I understood none of the instructions once again so back to the Tubes I went.

Some guts showing before the lining was put in

Lining was attached to the neckline and armholes by machina and to the zipper band by hand, shoulders were closed, one thing was left.


The Hem


Wow what an unpleasant ride that was. They just say something along the lines of "hem it." in the instructions. Yep. Ok. Cool. How. So I folded it twice over, ironed it, stitched it. For both the linen and cotton voile, separately.

That was not a good idea.

The linen still cooperated as much as linen does. It's far from haute coutûre, but there's nothing glaringly wrong with it, you can just tell it was made by someone who's probably hemming for the first time.

But the voile? The freakin' cotton voile? Don't do it like that! I don't know how else, but don't double-fold-iron-pin-sew, it won't work! I won't even show how bad it is, because I don't have to, it's the lining, it's hidden, it's my dirty-ass secret, y'all can't see it, but you just have to take my word for it: the way Denethor eats a cherry tomato looks less disturbing than what I've achieved with this hem.

/rant

So, I got a dress.

Don't mind the dead plant, I forgot to move it.

It's a bit heavy. And thus a bit warmer that I intended. But it's a dress. I made it. I made a dress. Dopamine aquisition is a success.

I did cowardly follow the sizing chart to a tee, so the waist seems a bit undefined. I could take it in, but probably won't. Next dress I'll try to be a bit more courageous and use MY size, although I'm unsure how.

It's a very simple-looking dress, perfect for sporting bold accessories without being over-the-top.


Now, on to procrastinating for my already chosen, already bought for next project! (I need to know my cup size, idfk send help)

Saturday, 1 May 2021

Gardengate Sweater

 Whilst I'm taking a break from working on my Zweig due to the structural integrity of my hand being compromised STILL, I'll blabber on about other sweaters I've made!

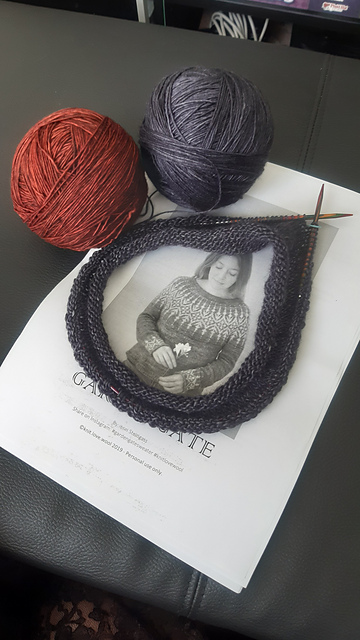
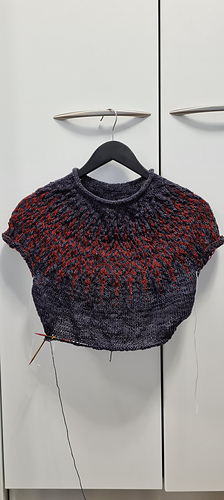
I had been stalking Jennifer Steingass on Instagram in the Spring 2019, leading to June of the same year, to jump on the Gardengate sweater as soon as it was published. It's so darn pretty. However I only cast it on about a year later due life in general. I had found the yarn for it not long after its publishing, though! I wanted an almost black and an embery-smoldering orangey-red. 

I got this in Julie Asselin Leizu Fingering Simple in the colour Midnight Oil, and La Bien Aimée Merino Single in Kitsune. All at my favourite LYS in Jyväskylä, Titityy.


Old Norwegian cast on is quickly growing to be my favourite

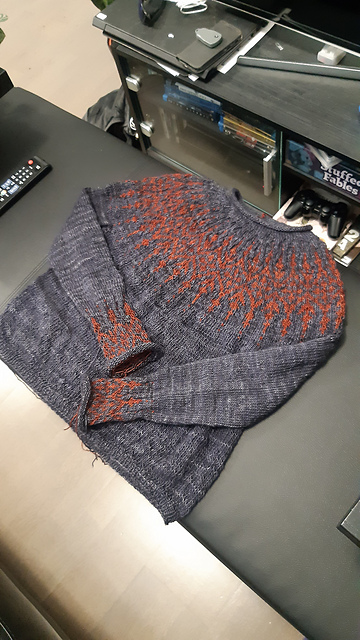
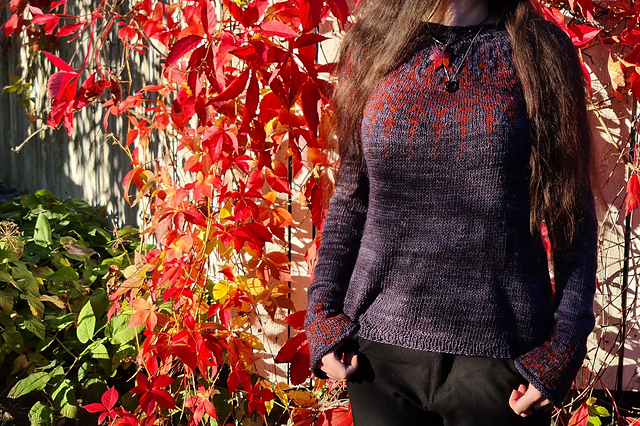
Had I done the zero saturation test, I'd have noticed that the contrast between those two isn't extra. But I learned to actually adore the overall darkness of the sweater, it's the first happy little accident, this lack of "pop".


Has a black metal look to it, doesn't it?


Second happy little accident was the fit.

I... kinda swatched? Okay okay FINE I counted the stitches on the neckline and called that a gauge check, ye happy? It looked alright then.

What I didn't take into account, as a green knitter, was the silk content in Leizu Fingering Simple. How that would affect the drape of the garmen, and not just make it softer to the touch. Sooo I got one heckin drapey, loosely fitting sweater when I originally cast on to get a zero ease product.

That's boxy. I cast on for size A. And that's BEFORE blocking!

But I blocked it anyway, no choice, my tension had been uneven through out the whole make and it showed. So blocked I did. And loe and behold, it evened out my stitches and made it grow lenght-wise! The positive ease all of a sudden looked intentional, like I made it a bit oversized on purpose!


Now it's the comfiest sweater I own, it's my go-to when I want to spend a lazy-cozy moment.

Also, it being very loosely knit and it being a single ply, I feared it would pill like a mf. It pills. But for the amount of wear it gets, it's really not as bad as I pictured it. I wonder if it's because of the silk content? As you see, I'm still a green knitter and I don't fully comprehend all the properties of every fibre material.

Conclusion: Sometimes letting go of total control and just going with the flow and see what happens ends up in success stories!

Saturday, 11 April 2020

Newleaf sweater

I wish I could say I got this done during the quarantine, but nope. Here we're not yet at the point where non-essentials are closed yet, unlike sensible countries. So from my need to wind down after daft shifts, a sweater was born.

It all started when we visited the same ol' Titityy in Jyväskylä, the cutest yarn store I've seen in these lands. We were walking past walls and walls of indie dyed skeins and something caught my attention...


Maybe because it looked like a metallic tone of grey, who knows. I usually only wear dark colours.

So I thought I'll buy a sweater quantity and find a pattern afterwards (thing I swore never to do to keep my stash to a minimum. So much for that!)

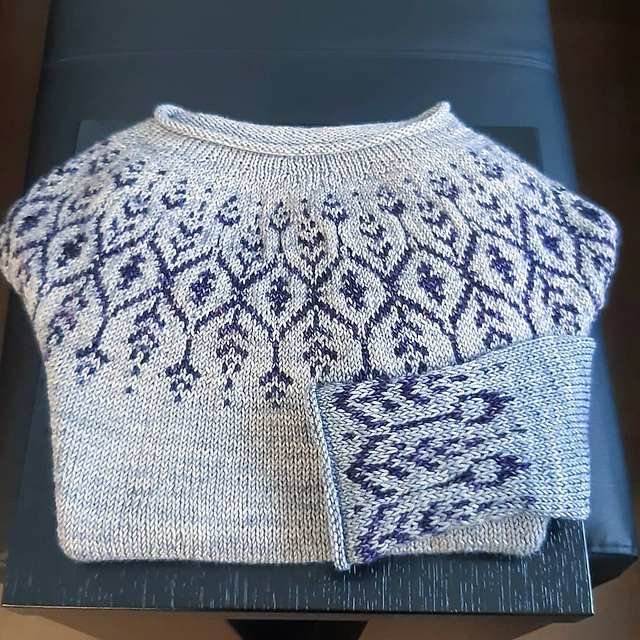
Later on I discovered stranded colourwork designs by Jennifer Steingassand fell in love with just about everything she'd made. I went for it, and got a contrast colour for the yoke bit,


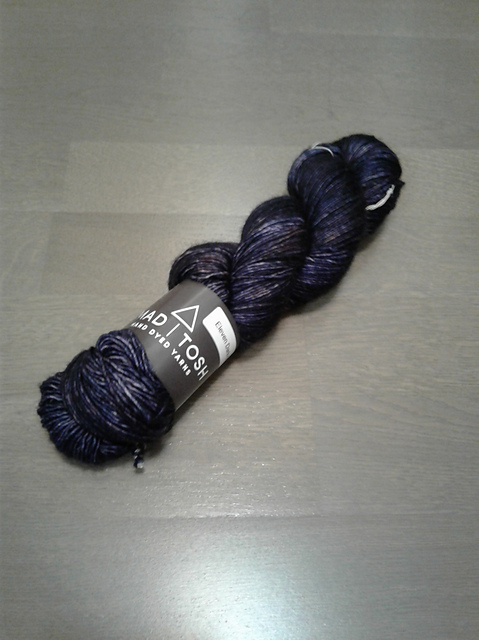
Some lightly varigated dark purple.

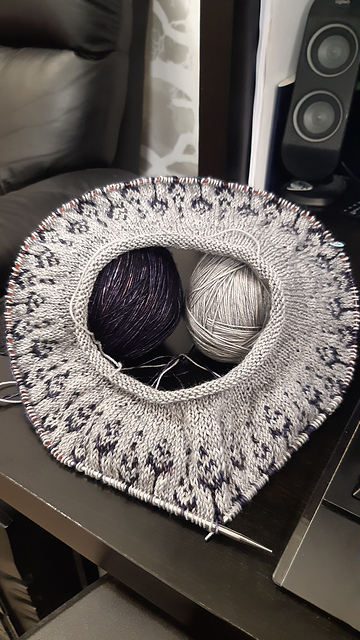
And hop, I cast on. The pattern is super easy to understand, it's got videos linked to show some techniques, and once you embark on the colourwork journey, the knitting becomes rhytmic and hard to put down, I would have worked on it for hours and hours straight, if it wasn't for my hand saying nope after a while.

So in no time, we went from this:


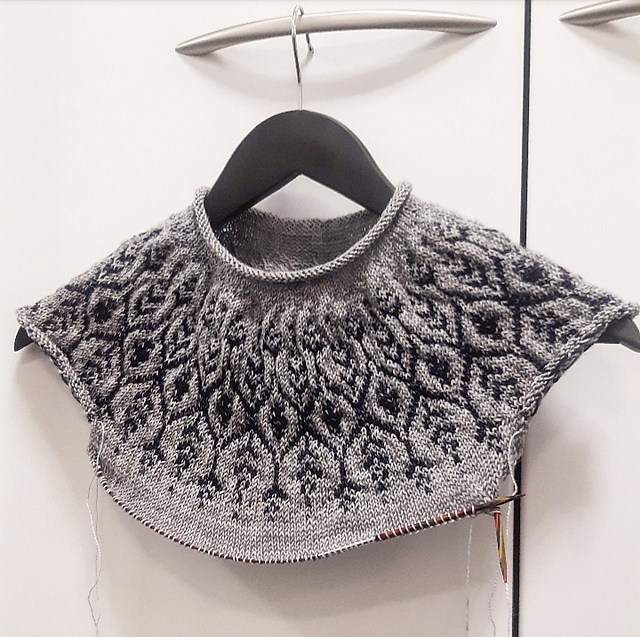
To this:


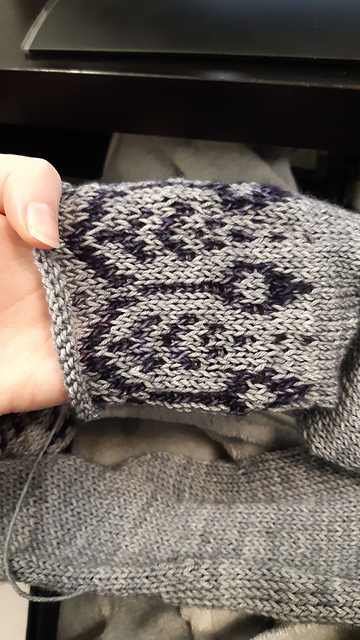
That picture was taken right after I separated the sleeves ffrom the body. The yoke was done, what I had in front of me was hours worth of plain stockinet stitch ahead. I love this, I can just knit away while spacing out, listening to podcasts, whatever. It's meditative.

I went for the long sleeve version. I'm just not sure what's the use of a merino jumper if my arms are going to be left in the cold...

Well I learned some things whilst doing the colourwork on the sleeves.


First of all, it's pretty. It binds the whole look together.
Second of all: Fuck. Stranded work. On double-pointed needles. When you don't know what you're doing yet.
I ended up liking making the second sleeve, but the first one was a bloody disaster that I had to rip out once or twice before the "ahhh" moment.


And here we have it, after a not-too-aggressive steam blocking to relax and even out the stitches, the final product. The reason I hesitate to give it a good wet block is the multitude of horror stories I read about Madelinetosh yarns bleeding like crazy. To pay this price for yarn and still having to pre-wash it ourselves... pff.

I share this project with a half portion of humbleness, and a half portion of pompous pride flowing out of my... well anyway.

Technicalities~
Pattern:
Newleaf by Jennifer Steingass 
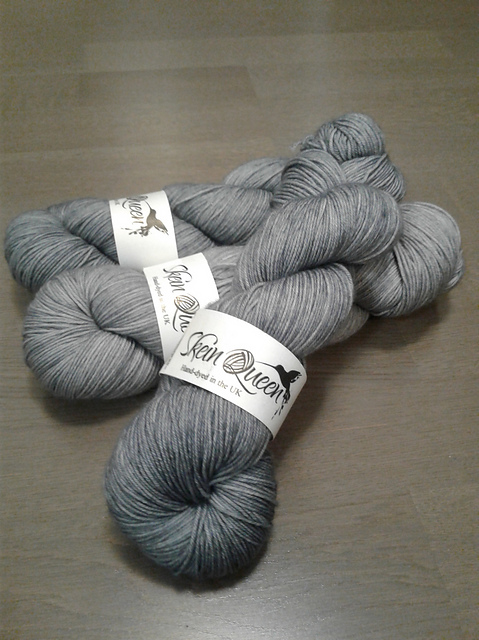
Yarn: Skein Queen in Crush
Colourway: Abbey Ruins
Yarn: Madelinetosh in Tosh Merino Light
Colourway: Eleven Dark

Now I'm working on a Clapotis scarf. Not as exiting as a whole garment in my biased opinion, but it's been on my wishlist for as long as I've been knitting.

Sunday, 29 September 2019

Lantern as plant display

Plants are pretty plants are life
Especially if they're easy going and/or have dope colours like our pal here: Tradescantia Zebrina


All this was grown from a stem that I accidentally broke and panic-planted in some soil in hope to save it. It had three leaves attached to it at that moment. A year later... I think it was a success?
Oh and a Pothos leaf makes an appearance on the right. It's from its last pruning, dunno what I'll do with it yet.

This plant is suuuper easy to propagate. Snip right above a leaf and stick it in dirt. Boom. You can also root it in water, but either way works just as well and no rooting hormone is needed. Actually we kept close watch on a stem that we put in water, and after only 11 hours we had a wee beginning of nub poking out. What is in the nursery pots were directly planted in soil from tiny cuttings. Did I say it's an easy going plant? It's an easy going plant.


Look at this beauty, pictures don't do justice to the shimmery silver stripes on the top.

Anyway, we have enough of it to think about giving cuttings to people and start decorating with it, and the latter is just what I'm about to document here.

The idea was my husband's, backed with enthusiasm by yours truly. We were at a garden center with the intention of just visiting around and have lunch at the bistro upstairs, but being surrounded with so many pretty things was too inspiring.
The man has been into lanterns since the game Amnesia: Dark Descent came out I think. If the idea of hiding in a dark corner hoping unkillable monstrocities don't find you and rip you apart doesn't warm your heart, I don't know what will.

We almost came back with a swirly grey and brownish pot, but decided to go with glossy black. To make the plant the star of the show.

Since our gal Zebrina likes a lot of light, we wanted to have some contraption where we could put a grow light right above it and have fun watching it grown in a pretty setting. Well, prettier than the herb light it's in right now. Which was meant to grow cooking herbs. And now I don't have herbs. Only Tradescantia. Oh well.


So the top came off with a hack saw and the bulb socket (?) was glued in with some... glue-putty-thing? (English as a second language, have pity) Next will be a couple coats of black spray. As fun as said-putty is fun to poke, it's a bit unsightly. I won't show a picture of that step, let's just skip to the fun part: propagating!


From that stock we managed to also fill in a pot with what was rooting in water. Fingers crossed, if this goes well, Mother-in-law will have a shiny new plants in a few weeks!


After choosing healthy-looking tips from the big mama plant and leaving a proper lenght of stem on it, we crowded the pot, on top of normal potting soil with slow-release fertilizer in it. We then gave it a good sip of water. 
Note that the pot has a drainage hole at the bottom. Unless it's terracotta or some other porous material, I think a pot should always have a drainage hole. You don't ever want the roots to be sitting in soggy mud. That's the #1 house plant killer.

That's also when we noticed that we probably should prune mama plant more often, as it's kinda leggy. But oh well, we love her anyway, she's happily trailing over the whOLE DAMNED WORLD and takING OVER OUR PITIFUL MORTAL HUMAN RACE. Happy plant, happy house, immaright?


This is the beginning of something cool. The light bulb is rrrreally bright. Really bright. I think plants around it might get a growth boost, so that's neat. It kinda kills the picture, but be assured, it's more colourful in real life.

Also, seen on the left is some bits that didn't make the cut (OOOoooh word play) for our project but we didn't want to just throw it away, so we replanted it. Let's see where it leads, and let's think of someone to give it to when it inevitably grows to take up every square meter of the house.

I could wait a few weeks and post what it looks like then, but I think I'd rather hit "Publish" now and give an update picture in a new post, when progress shows.
So this is the conclusion for now. A sweet, life-loving Tradescantia Zebrina in a good looking new home.

:)


P.S. Pothos seems happy as well, we planted it at the same time as the rest and it's already pushing out a new leaf! We're doing something right! My heart is full of rainbows.